San Jose Cabinet Refinishing offers an affordable facelift for existing cabinets. It can be ideal for historic preservation or a temporary solution to a kitchen design challenge.
However, it limits your changes to the current surface structure. For example, if you want to change the door style or wood species of your cabinets, refacing is a better option.
Refinishing is an excellent option for homeowners seeking to update their kitchen without a complete cabinet replacement. Using a signature finishing process that includes meticulous surface preparation and multiple coats of professional-grade paint, our cabinet refinishing delivers a beautiful and durable finish.
Cabinet refacing isn’t a DIY-friendly project, and proper preparation is essential for minimizing disruptions and ensuring an accurate finish. The refacing process typically takes 3-7 days, turning your kitchen into a work zone and adding several extra days for drying time. With both methods, it’s best to clear the space and move any items that can be moved to a temporary location or boxed up to avoid damage.
To begin the refinishing process, we thoroughly clean the cabinets with a degreaser solution that removes oils and dirt to ensure an even finish. This process also eliminates any odors and prevents the new paint from chipping or peeling.
Once the cabinets are cleaned, they are sanded with an orbital sander to create a smooth and consistent surface. After sanding, the wood is prepped for painting by applying a high-quality primer. Once the primer is dry, we lightly sand again to prep the surface for the final coat of paint.
For both refacing and refinishing, it’s important to choose the right paint for your cabinet color and style. We recommend choosing a neutral shade that will complement your existing decor and work well with your countertops, backsplashes, and other architectural features of the space. If you’re not sure what kind of finish would look best in your space, we’re happy to provide recommendations and samples!
Repair
Refinishing requires the same preparation as painting and will include using a chemical stripper, as well as paint brushes, sandpaper, and a sprayer or paint gun. The process also includes repairing any dents or gouges in the wood, filling them with wood putty, and sanding the new finish before applying it. This step helps ensure that your new finish will last and protects the cabinets from moisture damage and staining.
Cabinet refinishing is perfect for people who are content with their current cabinet doors and boxes, but want a more modern or updated look. It’s also an excellent choice for homeowners who want to save money and stay away from the mess of complete replacement. This process is also good for those who are concerned about environmental impact, as refinishing uses fewer chemicals than new construction options.
Choosing between refinishing and refacing will depend on your personal preferences and the condition of your cabinets. Refacing is a more extensive option, as it replaces the cabinet boxes and cabinet doors with material like wood veneer or rigid thermofoil (RTF). It can take longer than refinishing and can cost more than refinishing as a result. However, it provides a long-term solution and is ideal for those who plan to stay in their home for 15-20 years.
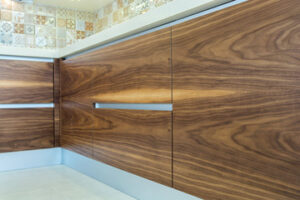
With refacing, you can choose to use wood veneer or RTF in a variety of finishes, including natural wood grain patterns and other more contemporary styles. You can also opt for a more neutral color or even a two-tone approach. Once the materials are installed, you’ll install the hinges and drawer knobs and enjoy your brand-new kitchen! Regardless of the type of cabinet you choose, working with a professional will help you achieve the best results.
Primer
The primer process is one of the most important steps to a successful cabinet refinish. It helps the topcoat paint bind to the surface and creates a smooth surface that will hold up for years.
There are many types of primers on the market, including oil-based and water based products. There are also specialty primers that are formulated for specific surfaces, such as wood or stucco. These primers typically have a higher resin density and help the topcoat paint bind to the surface. They can also provide a more durable finish, which is helpful for high-traffic areas.
When applying the primer, it is important to lightly sand the surfaces before and between coats. This will help the topcoat adhere to the surface and remove any imperfections. Once the primer is dry, it is a good idea to vacuum and tack-rag the surface to ensure it is clean and ready for the next step. This is also a good time to caulk any cracks where the cabinets meet walls or crown molding.
Once the surface is primed, it is important to allow the primer to dry completely before proceeding to the staining process. Vacuum the surface again to ensure it is completely dust-free. It is also a good idea to apply another coat of primer for maximum protection.
Cabinet refinishing is an excellent option for homeowners who are looking to update their kitchen without spending a lot of money. However, it is important to understand that refinishing does not address structural changes or major wear and tear on the cabinets. It is also not a good option for older cabinets that may not take well to sanding or new finishes, or may have more significant issues with moisture or other environmental factors.
Stain
Stained cabinets are a popular choice for homeowners who want to achieve a classic, traditional look in their kitchens. The stain soaks into the wood, allowing knots and grain variations to show through for a unique, natural appearance. To properly stain cabinets, it’s important to sand the cabinet doors and cabinet boxes to create a smooth surface that will accept the new color or finish. It’s also necessary to test the stain in an inconspicuous area of the cabinet, and allow it to dry completely to see how the finished project will look. Applying too much stain at once can lead to uneven coloration and blotching, so it’s best to apply the stain in thin coats.
Once the cabinet is stained, it’s a good idea to protect it with a protective seal. This will help ensure that the new finish lasts as long as possible, and protects the cabinet from moisture, heat, and other environmental factors. Depending on the stain type and finish, this can be done with either polyurethane or lacquer.
While the process of refinishing cabinets is relatively simple, it is not without its challenges. For the best results, it’s essential to have a well-thought out plan that outlines each step of the process. This will ensure that the project is completed in a timely manner and that the final product meets your expectations. In addition, it’s important to choose a contractor who has the experience and knowledge needed to complete the job. They will be able to provide expert advice on the various options for stain and finishes, and ensure that all of the necessary steps are taken to achieve the desired results.
Paint
While a quality paint job can help your cabinets look great for years, even the most durable finish eventually shows its age. After about five to ten years of holiday feasts, weekday chaos, and everything in between, chips and scratches become hard to ignore. At this point, it’s time to consider refinishing or refacing.
Before you start painting, it’s a good idea to test the surface for oil-based or water-based paint. To do this, dip a cloth or cotton ball in rubbing alcohol and rub it over an inconspicuous area of the cabinet. If the paint comes off easily, it’s most likely latex; if it doesn’t, it’s most likely oil-based.
If you are refinishing or repainting over an old finish, all surfaces need to be sanded. This helps create a rougher surface (called “tooth”) for the new finish to adhere to, which will extend the life of the cabinet. After sanding, you’ll need to fix areas with scratches, dents and gouges with wood filler and sand again until the surface is smooth.
Once the sanding and repair work is done, all surfaces to be painted get a coat of primer. It’s recommended to use a high-quality commercial oil-based primer, as this offers the best protection against moisture and other environmental factors that can damage the cabinet’s wood.
It’s important to remember to leave the doors and drawer fronts out of the cabinet “boxes” while you’re painting. It’s also a good idea to keep track of the placement of each piece so that you can put it back together correctly once the project is done. Finally, it’s a good idea to open windows and use fans for ventilation while spraying.